How to Make Pumpkin Bread Gluten Free: Simple Steps
Table of Contents
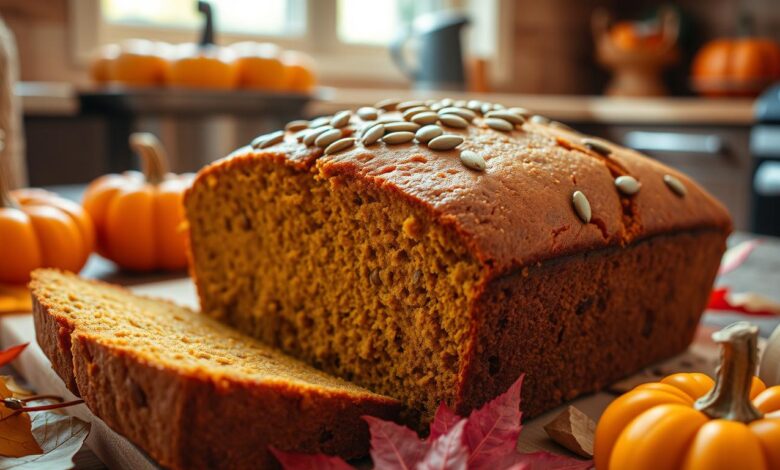
As autumn arrives, the smell of pumpkin bread fills the air. It brings back the cozy feelings of fall. For those who can’t eat gluten, making this treat might seem hard. But, with the right ingredients and steps, you can make a tasty gluten-free pumpkin bread.
In this guide, we’ll show you how to make a moist, tasty pumpkin bread without gluten. Whether you’re experienced with gluten-free baking or new, you’ll learn how to make great pumpkin bread.
Understanding Gluten-Free Baking Essentials
Learning to bake gluten-free can change your life if you avoid wheat. It’s all about knowing the special ingredients needed. We’ll look at the best flours and binding agents for success in gluten-free baking.
Best Gluten-Free Flour Blends
Gluten-free baking needs a mix of flours for the right texture and rise. You can use rice flour, almond flour, tapioca flour, and gluten-free baking blends. Try different mixes to find what works best for you.
Important Binding Agents
Gluten-free bakers use special ingredients to keep their recipes together. Xanthan gum is a key one that helps with structure and rise. Using the right amount of these agents is key for the right texture.
Measuring Techniques for Success
- Accurate measuring is crucial in gluten-free baking. Use weight for dry ingredients for consistent results.
- Don’t over-mix, as it can make your gluten-free treats dense and tough.
- Watch the moisture levels in your recipes, as gluten-free flours act differently than wheat.
By grasping these gluten-free baking basics, you’ll be ready to make tasty gluten-free treats at home.
Required Ingredients for Gluten-Free Pumpkin Bread
Making gluten-free pumpkin bread at home needs the right ingredients. You might want a classic recipe or try dairy-free and vegan pumpkin bread. Knowing the key ingredients is crucial for success.
The main ingredient is pumpkin puree. It brings a warm flavor and adds moisture and structure. Choose high-quality canned pumpkin or roast and blend fresh pumpkin for the best taste.
To replace gluten, use a mix of gluten-free flours. Rice flour, tapioca flour, and potato starch work well. Add xanthan gum or psyllium husk to help the batter stick together.
For a dairy-free or vegan version, use plant-based milk and eggs. Try unsweetened almond milk, coconut milk, or oat milk instead of dairy. Flax or chia eggs can replace regular eggs.
| Ingredient | Classic Pumpkin Bread | Dairy-Free Pumpkin Bread | Vegan Pumpkin Bread |
|---|---|---|---|
| Pumpkin Puree | 1 cup | 1 cup | 1 cup |
| Gluten-Free Flour Blend | 2 cups | 2 cups | 2 cups |
| Eggs | 2 | Flax or Chia Eggs (2 tbsp ground flax or chia + 6 tbsp water) | Flax or Chia Eggs (2 tbsp ground flax or chia + 6 tbsp water) |
| Milk | 1 cup | 1 cup unsweetened almond or coconut milk | 1 cup unsweetened almond or coconut milk |
| Butter or Oil | 1/2 cup melted butter | 1/2 cup melted coconut or avocado oil | 1/2 cup melted coconut or avocado oil |
| Sweetener | 1 cup brown sugar | 1 cup maple syrup or coconut sugar | 1 cup maple syrup or coconut sugar |
| Binding Agent | 1 tsp xanthan gum | 1 tsp xanthan gum | 1 tsp psyllium husk |
| Spices | 1 tsp cinnamon, 1/2 tsp nutmeg, 1/4 tsp cloves | 1 tsp cinnamon, 1/2 tsp nutmeg, 1/4 tsp cloves | 1 tsp cinnamon, 1/2 tsp nutmeg, 1/4 tsp cloves |
Choosing and mixing these ingredients will help you bake a delicious gluten-free pumpkin bread. It’s perfect for everyone to enjoy.
Essential Kitchen Tools and Equipment
Mastering easy gluten-free baking needs the right tools. You’ll need mixing and measuring tools, baking pans, and devices for temperature control. The right tools help you get consistent, tasty results.
Mixing and Measuring Tools
Getting the right measurements is key for gluten-free baking. Get a good set of measuring cups and spoons. A strong mixing bowl, made of stainless steel or glass, is also important. It gives you enough room for mixing.
Baking Pans and Liners
Choosing the right pan is crucial for gluten-free pumpkin bread. Use a loaf pan or muffin tin, depending on what you like. Always line your pan with parchment paper or silicone liners. This makes your bread easy to remove.
Temperature Control Tools
Keeping the oven at the right temperature is vital for easy gluten-free baking. An oven thermometer helps you keep an eye on the temperature. Also, get a digital thermometer to check the bread’s internal temperature.
| Tool | Purpose | Recommended Features |
|---|---|---|
| Measuring Cups and Spoons | Accurately measuring ingredients | Clearly marked measurements, durable construction |
| Mixing Bowl | Combining wet and dry ingredients | Stainless steel or glass, with a large capacity |
| Loaf Pan or Muffin Tin | Baking pumpkin bread | Non-stick surface, durable construction |
| Oven Thermometer | Monitoring oven temperature | Digital display, wide temperature range |
| Digital Thermometer | Checking internal bread temperature | Accurate readings, easy-to-read display |
With the right kitchen tools and equipment, you’ll get better at easy gluten-free baking. You’ll make delicious pumpkin bread that will impress everyone.
Preparing Your Pumpkin Puree
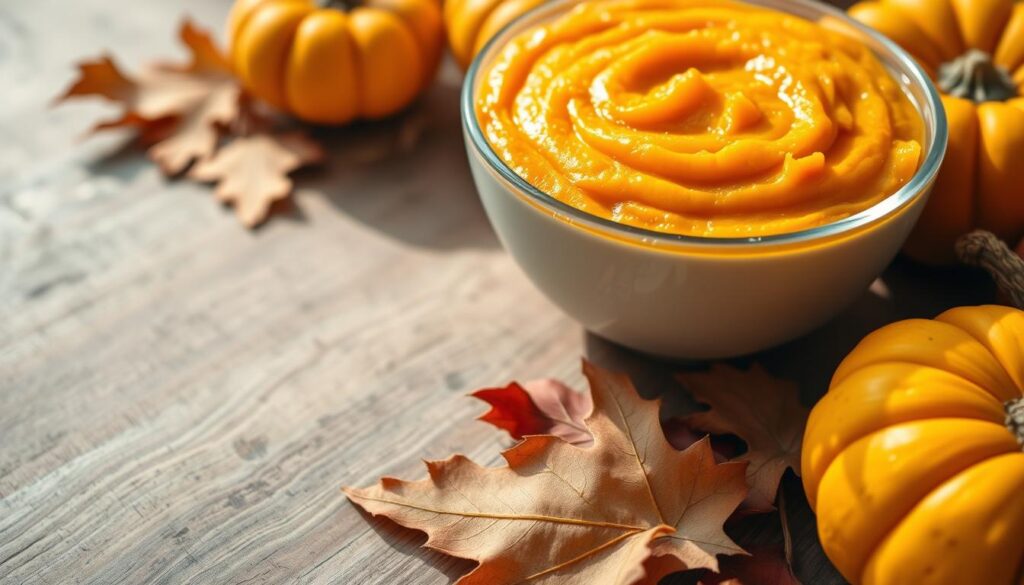
Pumpkin puree is key for making delicious pumpkin-based treats, like gluten-free pumpkin bread. It’s important to use high-quality pumpkin puree for the best taste and texture. You can choose between homemade or canned puree, but make sure it’s without added sugars or spices.
Making your own pumpkin puree is easy. Pick a sugar pumpkin or pie pumpkin. Cut it in half, remove the seeds, and bake the halves at 400°F (200°C) until soft. This takes about 45 minutes to an hour. Let it cool, then blend or mash it until smooth.
For a quicker option, canned pumpkin puree is a good choice. Look for canned pumpkin without additives. Avoid canned pumpkin pie filling, as it has sugars and spices that can change your bread’s flavor.
| Homemade Pumpkin Puree | Canned Pumpkin Puree |
|---|---|
|
|
Whether you make your own or use canned, the pumpkin puree greatly affects your gluten-free pumpkin bread. Enjoy the season with a pumpkin loaf that will wow your loved ones.
Step-by-Step Pumpkin Bread Recipe Gluten Free
Making delicious pumpkin bread that’s gluten-free is easy. Just follow these simple steps to make a moist and tasty loaf.
Mixing Wet Ingredients
Start by mixing the wet ingredients in a big bowl. Whisk together the pumpkin puree, eggs, vegetable oil, and maple syrup until smooth. This is the base of your gluten-free pumpkin bread.
Combining Dry Ingredients
Next, mix the dry ingredients in another bowl. Use your favorite gluten-free flour blend, baking soda, baking powder, ground cinnamon, and a bit of salt. Whisk until everything is well mixed.
Proper Baking Techniques
- Preheat your oven to 350°F (175°C).
- Grease a 9×5 inch loaf pan with non-stick spray or parchment paper.
- Fold the dry ingredients into the wet ones gently, avoiding overmixing.
- Pour the mix into the loaf pan and smooth the top with a spatula.
- Bake for 55-65 minutes, or until a toothpick comes out clean.
- Let the bread cool in the pan for 10 minutes before cooling it on a wire rack.
By following these steps, you’ll make a moist and tasty pumpkin bread recipe gluten free. Paying attention to details is key. With practice, you’ll master easy gluten-free baking at home.
Customizing Your Recipe: Variations and Add-ins
The beauty of homemade healthy pumpkin bread is its flexibility. You can change your loaf to fit your taste or dietary needs. Try these add-in ideas to make your seasonal baked goods stand out:
- Nuts and Seeds – Chopped walnuts, pecans, or pepitas add delightful crunch and texture.
- Chocolate Chips – Semi-sweet or dark chocolate chips offer a decadent twist.
- Spices – A touch of ground cinnamon, ginger, or nutmeg can enhance the warm, autumnal flavors.
- Dried Fruit – Chopped dried cranberries, raisins, or apricots lend a chewy sweetness.
- Streusel Topping – A simple streusel made with brown sugar, flour, and butter creates a delicious crunchy crown.
For a healthier version, try using unsweetened applesauce or mashed banana instead of some oil. You can also use almond or coconut flour to make your healthy pumpkin bread even healthier. With a bit of creativity, you can make your seasonal baked goods a true masterpiece.
| Ingredient | Quantity | Purpose |
|---|---|---|
| Chopped Walnuts | 1/2 cup | Adds crunch and texture |
| Semi-Sweet Chocolate Chips | 1/2 cup | Provides a decadent twist |
| Ground Cinnamon | 1 teaspoon | Enhances the warm, autumnal flavors |
| Dried Cranberries | 1/4 cup | Lends a chewy sweetness |
| Streusel Topping | 1/2 cup | Creates a delicious crunchy crown |
The best part of baking healthy pumpkin bread is trying new seasonal baked goods flavors and textures. Find your favorite and have fun experimenting!
Storage Tips and Shelf Life
Enjoy the delightful flavors of your gluten-free pumpkin bread long after the fall season has passed. Proper storage and preservation techniques are key to maintaining the freshness and quality of this seasonal baked good. Let’s explore the steps to ensure your pumpkin bread remains moist, flavorful, and ready to savor whenever the craving strikes.
Proper Cooling Methods
Once your pumpkin bread has finished baking, it’s important to allow it to cool completely before handling or storing. Place the loaf on a wire rack and let it sit for at least 30 minutes, allowing the steam to escape. This gentle cooling process helps prevent the bread from becoming soggy or losing its delicate texture.
Freezing Instructions
For long-term storage, freezing is an excellent option. Wrap the completely cooled pumpkin bread tightly in plastic wrap or aluminum foil, ensuring no air pockets remain. This helps lock in moisture and prevent freezer burn. Alternatively, you can slice the bread and freeze the individual slices for easy, on-demand access to your favorite fall recipes. Properly frozen, your gluten-free pumpkin bread can remain fresh for up to 3 months.
Reheating Guidelines
When you’re ready to enjoy your frozen pumpkin bread, simply unwrap the loaf or individual slices and place them in a preheated oven at 350°F (175°C) for 10-15 minutes, or until heated through. This gentle reheating process will revive the bread’s soft, moist texture without drying it out. Serve warm and savor the flavors of fall all year round.
By following these storage and reheating tips, you can extend the shelf life of your homemade gluten-free pumpkin bread. Enjoy the comforting taste of seasonal baked goods long after the leaves have fallen.
Troubleshooting Common Issues
Baking gluten-free pumpkin bread can sometimes present a few challenges, but with the right troubleshooting tips, you can overcome them and enjoy a delicious and texture-rich result. Let’s explore some common problems and their solutions.
If your gluten-free pumpkin bread turns out dry and crumbly, the culprit may be an imbalance of wet and dry ingredients. Try increasing the amount of pumpkin puree or dairy-free milk in your recipe. You can also experiment with adding an extra egg or using a higher-fat milk alternative, such as coconut milk, to add moisture.
On the other hand, if your bread has a gummy or undercooked texture, you may need to adjust the baking time or temperature. Ensure your oven is properly preheated, and consider increasing the baking time in 5-minute increments until the bread is fully cooked through. Inserting a toothpick into the center is a reliable way to check for doneness.
If your gluten-free pumpkin bread bakes unevenly, with some parts overcooked and others underdone, the culprit could be an uneven heat distribution in your oven. Try rotating the pan halfway through the baking process or using a convection oven setting if available. You can also try using a lighter-colored baking pan, as darker pans can cause the exterior to overbake before the interior is fully cooked.
| Common Issue | Possible Causes | Solutions |
|---|---|---|
| Dry, crumbly texture | – Imbalance of wet and dry ingredients | – Increase pumpkin puree or dairy-free milk – Add an extra egg – Use higher-fat milk alternative |
| Gummy, undercooked texture | – Insufficient baking time or temperature | – Ensure proper preheating – Increase baking time in 5-minute increments – Check for doneness with a toothpick |
| Uneven baking | – Uneven heat distribution in the oven | – Rotate the pan halfway through baking – Use a convection oven setting – Try a lighter-colored baking pan |
By addressing these common issues and making the necessary adjustments, you can achieve perfectly moist, evenly baked gluten-free pumpkin bread every time. With a little troubleshooting, you’ll be on your way to baking easy gluten-free baking success.
Conclusion
Congratulations on your journey to making delicious gluten-free pumpkin bread! You now know how to bake a moist, tasty loaf. Even those who love gluten will enjoy it. The secret is using the right flour blends, binding agents, and measuring techniques.
Keep exploring the world of pumpkin bread recipe gluten free. Try new things like adding chopped nuts or a cream cheese filling. Enjoy the fall recipes season and have fun baking.
Whether you’re experienced or new to gluten-free baking, this recipe will be a hit. Enjoy the warm smell of pumpkin bread and be proud of your homemade treat. Happy gluten-free baking!
FAQs About Gluten-Free Pumpkin Bread
What makes this pumpkin bread recipe gluten-free?
What are the benefits of baking with gluten-free ingredients?
What are the key ingredients needed for this gluten-free pumpkin bread?
What kitchen tools are necessary for making gluten-free pumpkin bread?
How do I properly prepare the pumpkin puree for this recipe?
What are the key steps for making the gluten-free pumpkin bread?
Can I customize this gluten-free pumpkin bread recipe?
How should I store and reheat gluten-free pumpkin bread?
What are some common issues I might encounter when baking gluten-free pumpkin bread?
Share Your Experience with Our Recipe!
There are no reviews yet. Be the first one to write one.
